Tutorial to prepare the Christmas house Decora 3d
We are in December, one of the most beautiful months of the year. Christmas is coming and the preparations begin to enter all the houses in Italy. Who starts thinking and preparing gifts for loved ones, who starts to decide the Christmas menu, who dreams of making a nice winter holiday ... in short we are all taken from Christmas ... who more and those who less!
Sure, however, they are the children who live Christmas with real enthusiasm, that joy that only from children can have. Every year with Christmas approaching I dream of being a little girl and to live it as I did so many years ago. With waiting and trepidation, counting the days and hours that separated from Christmas. My most beautiful memories are me in the kitchen with my mom preparing Christmas cookies ... only thought makes me go back and feel the scent of cinnamon and freshly baked biscuits.
After cooking them, my mom hid the cookies ready so that they arrived until Christmas, but it wasn't very good at finding the right hiding places! My brother and I always came there and we stole them little at a time, so that by magic they decreased more and more. I remember my mom who got angry, but behind his angry there was a wide smile amused.
They were really beautiful times ...
They are memories that have been indelibly improved in my mind and every year I go to scrape them and think about it with so much love and happiness. I am grateful to my mother to have us spend every Christmas in joy and love.
Why do you tell you all this?
Because I asked two very good girls, Omelis Sega and Viviana Todini, to prepare a small tutorial to create a Christmas cottage for our blog. So you can prepare it for Christmas with your children or give it to those who are expensive. I'm sure your family or friends will appreciate a lot and that you will surely contribute to cheering Christmas!
Now I leave the word to our very good cake designers and I leave you in their hands to have fun with them to build the Christmas house ...
Little Gingerbread House
of Viviana Todini
When the cold becomes more intense, some countries cover by Candida Snow and the calendar reports that December has arrived, every nation has its customs, as well as each country has its typical products and every house its habits ... in mine, the air of Christmas arrives together with the scent of ginger and cinnamon invades the kitchen when they make cookies to prepare my gingerbread cottage, ingredient decoration and uneven and joyful tradition that has been repeated by many years now!
This year Sugarmania he gave me the opportunity to try my hand at a mold and new products, with which to prepare a mignon gingerbread cottage which is a real wonder, which cannot be missing on the Christmas table, and that for its size it is a perfect and delightful placeholder!
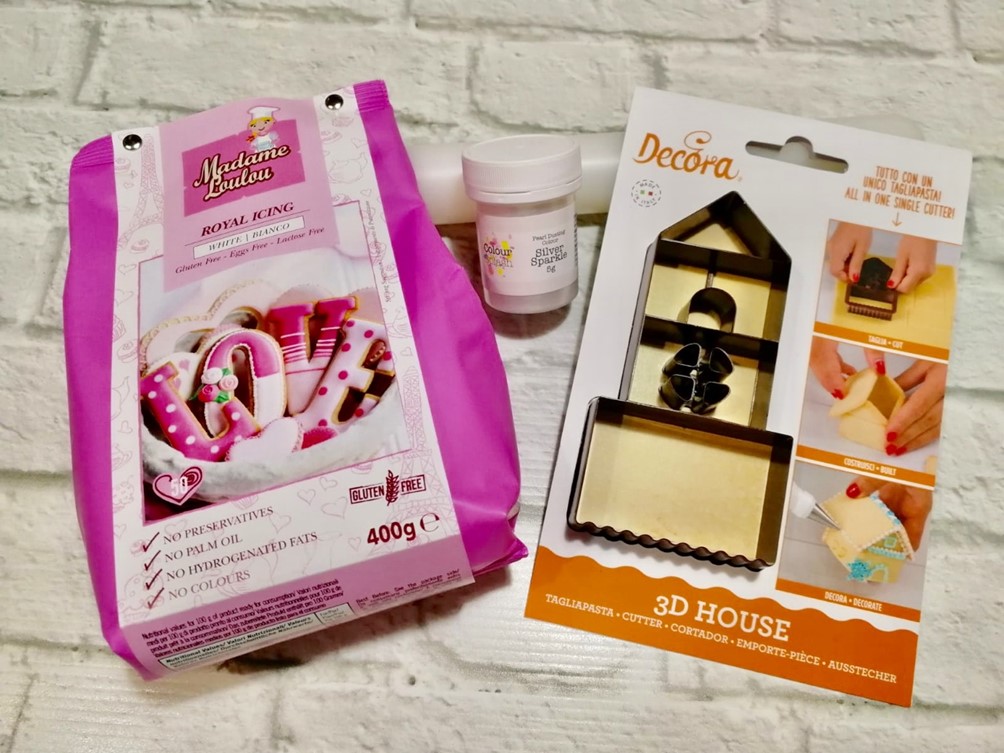
- You can buy the christmas cottage chip of 3D House Decora directly On Sugarmania - here
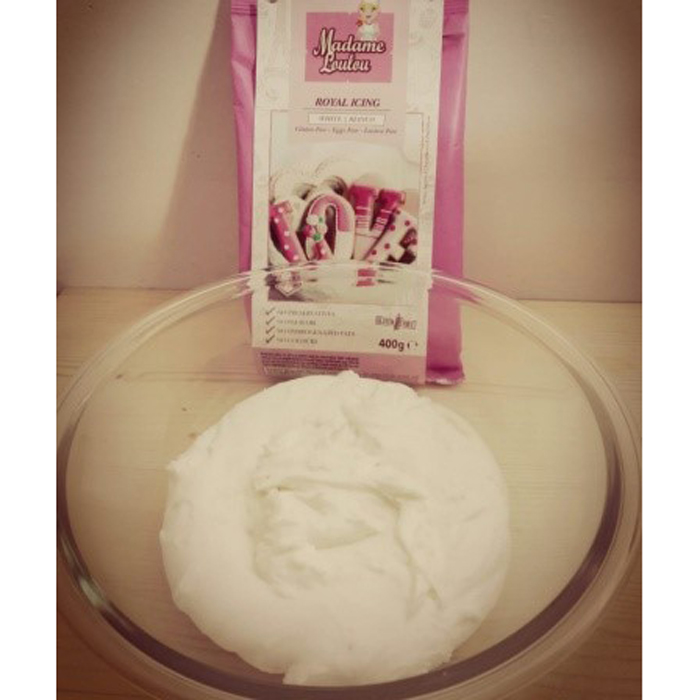
- To decorate your Christmas house I suggest you use the actual frozen (Royal Icing) Madam Loulou you can buy it On Sugarmania - here
And now ...
All at work, let's get the apron and prepare together a small and sweet cottage decorated in real iced!
1
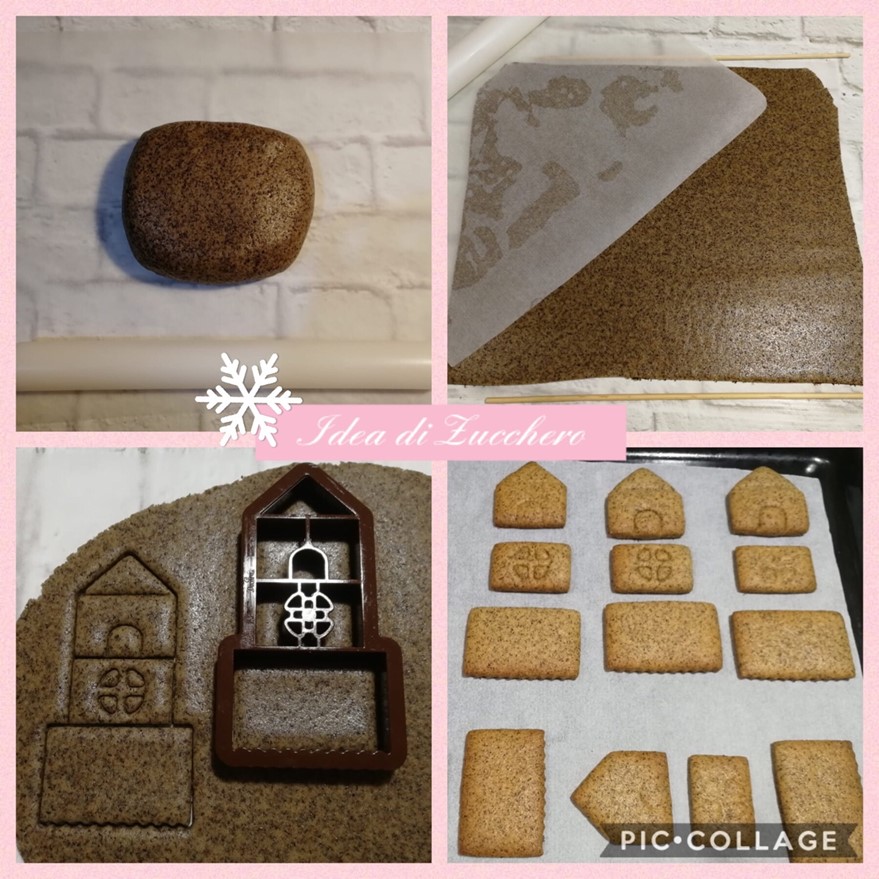
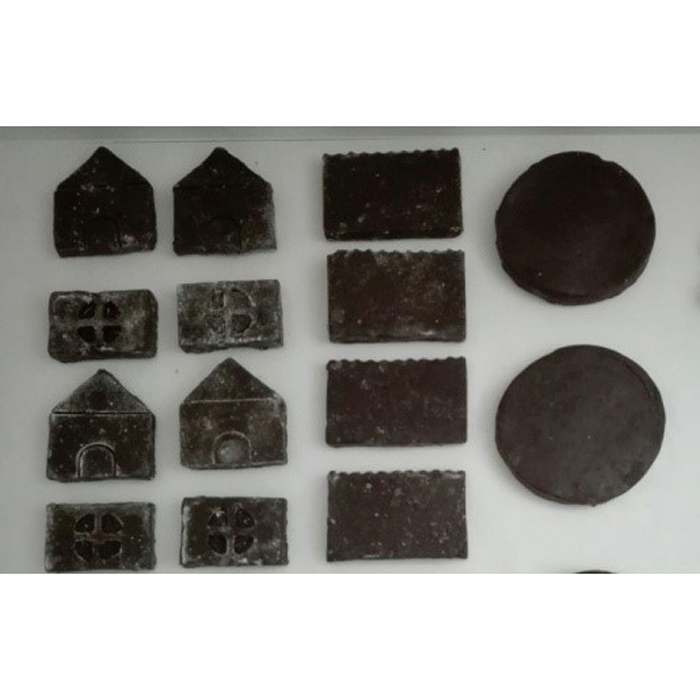
We prepare our dough of the gingerbread, a panel and then strain it with a rolling pin between two sheets of fortress paper, using two skewered stitches to the sides of the mixture to get a uniform thickness. We use the tagnup of the Decora to get all the pieces needed to build our cottage in one shot, and let's bake so many shapes how many houses we want to realize!
Small tip: After cutting the gingerbread with the locker, removing the excess, put in the fridge for ten minutes, and then put the pieces separate on the baking sheet covered with parchment paper, spacing them a bit because they grow slightly, so you don't have They attack!
2
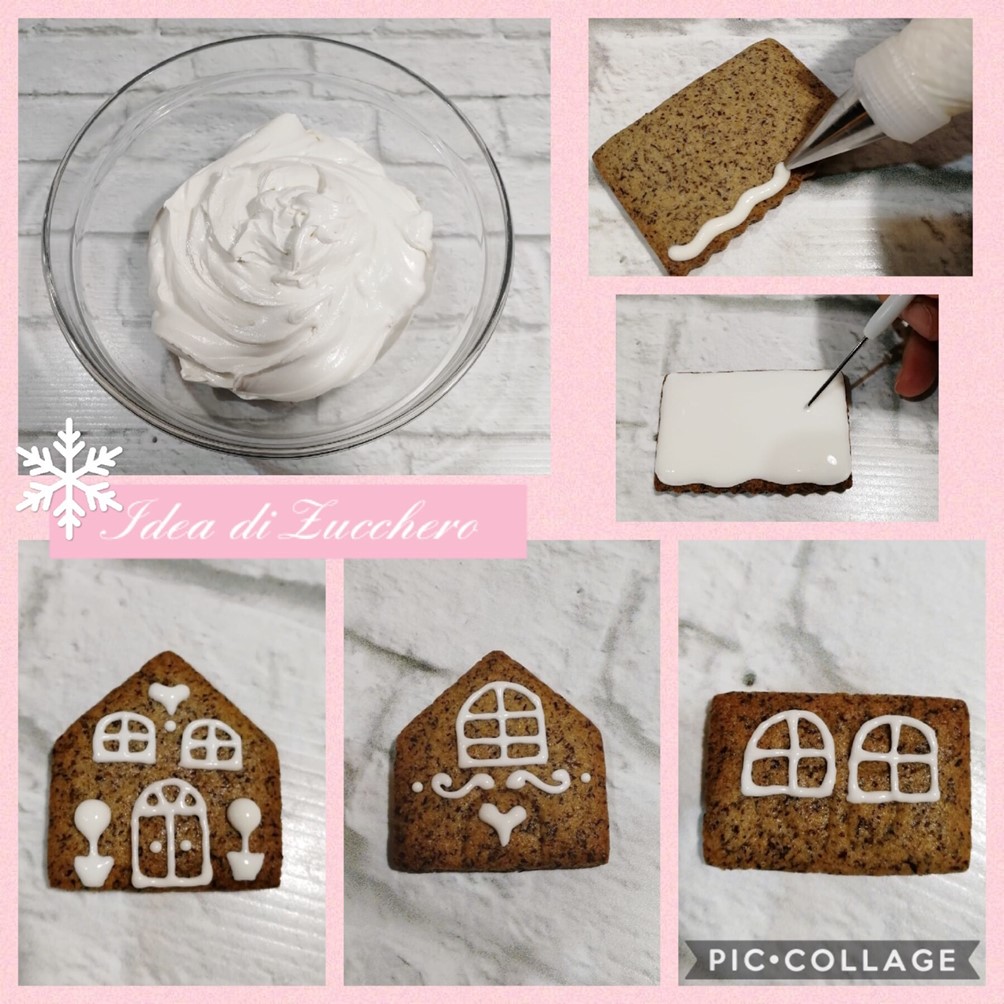
After baking and let it cool the biscuits very well, we prepare the actual glacter following the instructions on the package, then using a few sac with a fine pointed spout we decorate the various pieces of our cottage, using the signs of doors and windows already Impressed on the cookie from the mold, or giving free vent to our imagination!
We enrich with details, saplings, doodles! Let us help you with a pointed equipment (Scriber Tool) to "accompany" the ice at the points we want, and to remove small air bubbles that can form. To carry out the complete roof coverage of the roof, I recommend dilute the frozen with a few drops of additional water, so as to obtain a more fluid compound.
3
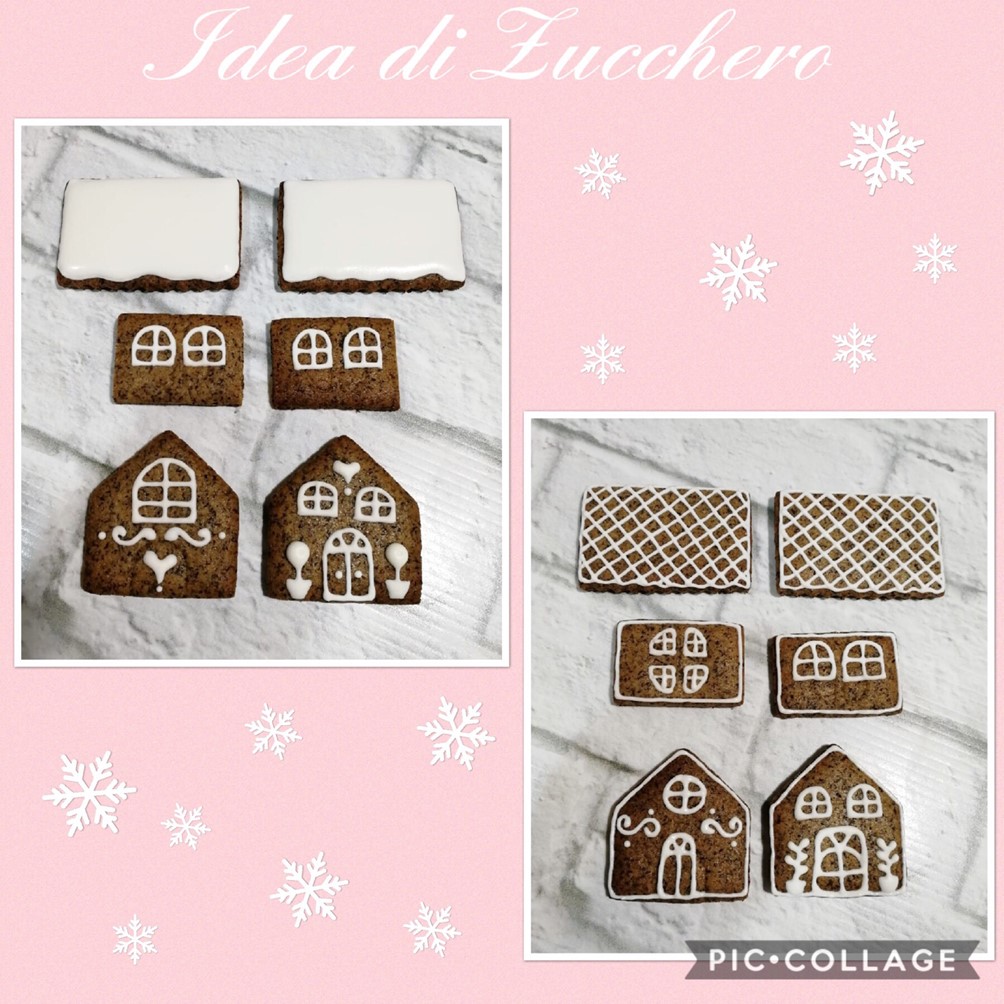
We make many decorations for many different houses, let's get out!
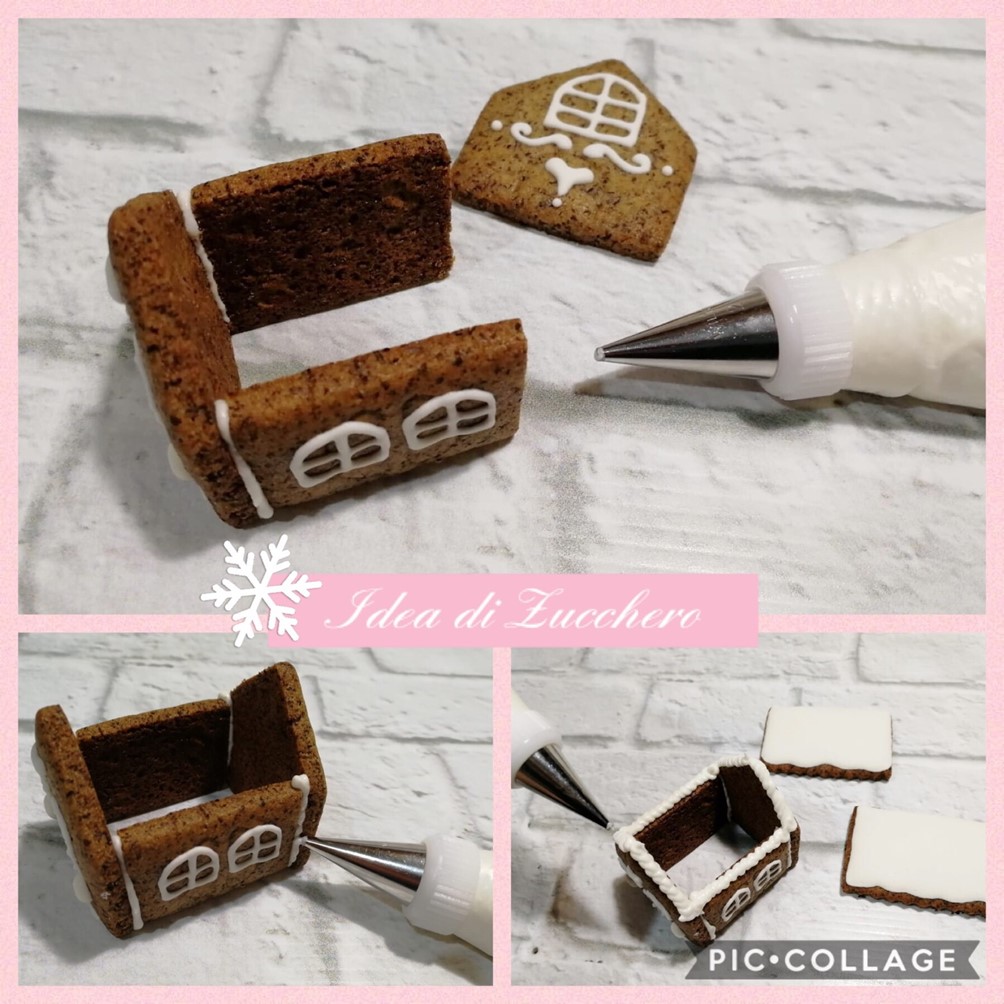
4
After making the parts that we have decorated very well, we can proceed with the assembly of our beautiful houses, always using the ice as a glue, inserting it in a few sac with a pointed spout a little bigger than that used for decorations.
After mounting the walls, let's dry at least an hour, then move on to mount the roof.
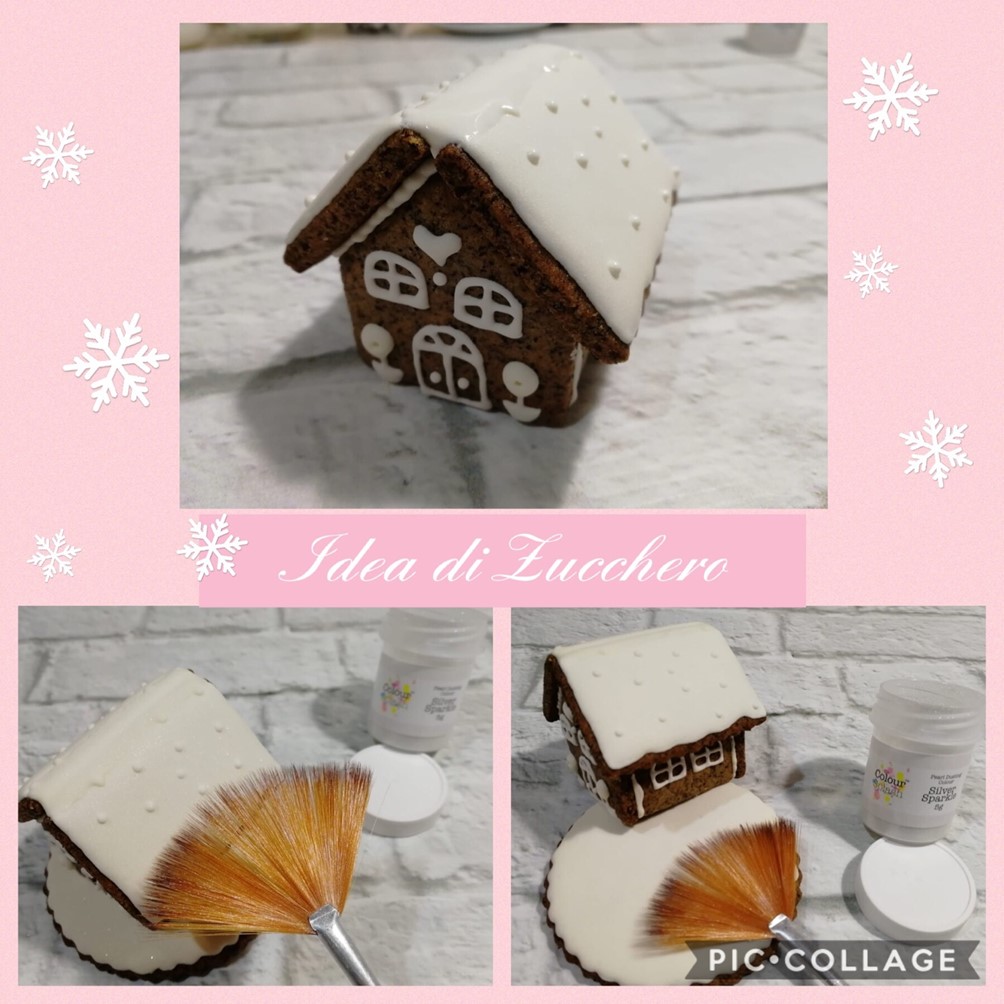
5
After doing everything to dry everything, with a soft and wide brush, we brush our cottages with pearlescent powder that will give a more valuable appearance to our creations. If you like it, you can mount the little house on a rounded round cookie.
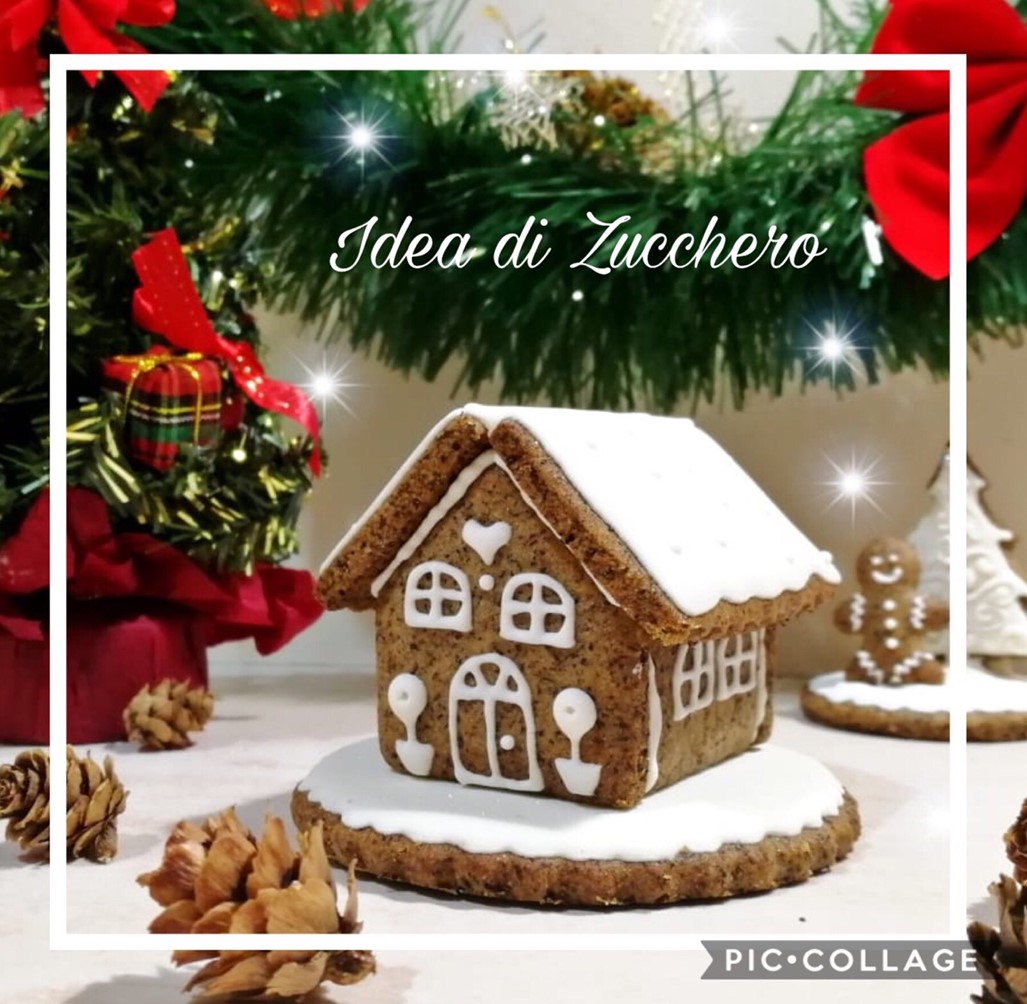
6
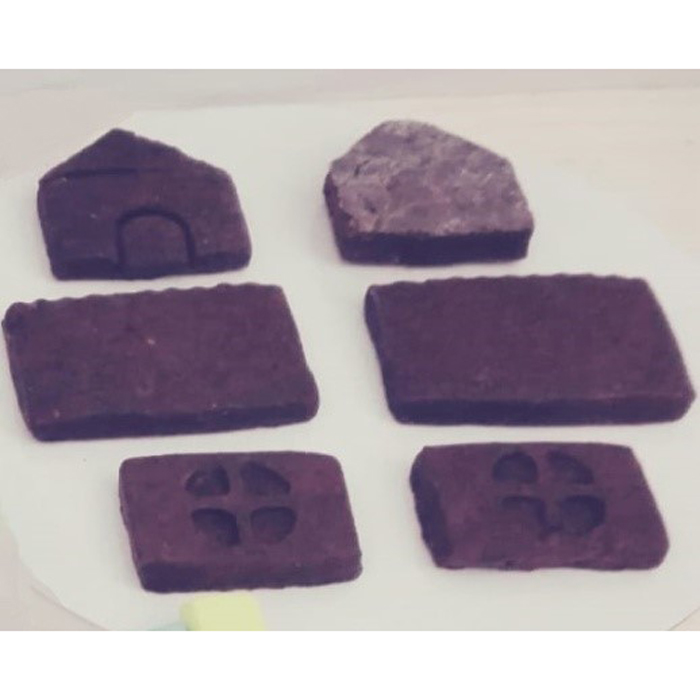
Here is one of my gingerbread houses, which will show beautiful on the Christmas table!
I thank the very good Viviana Todini for the tutorial and invite you to visit hisbeautiful Facebook page to discover other jobs! Our Christmas tutorials are not finished. Viviana showed you how to prepare the Christmas house in 3D in classic robe with white decor. Now instead the very good homilis will present you tutorial to prepare the colored Christmas house full of decorations.
Christmas house
of Omilis Sega
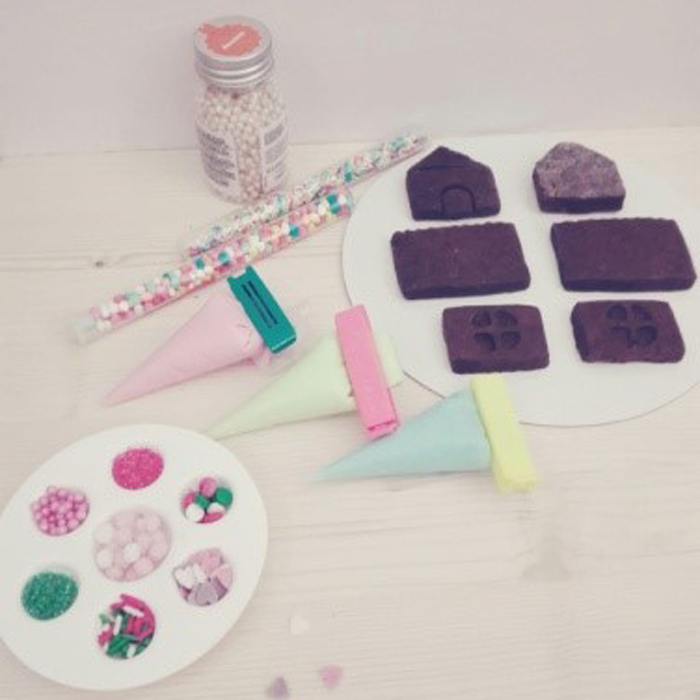
The Christmas houses are generally made with a ginger biscuit paste, cut and cooked in the oven, then once cold covered with different varieties of candy, icing and various decorations. In this opportunity I propose you to make it using the shortbread that you use to make your cookies. Take yourself together with your children or friends and prepared together with beautiful Christmas decorations to give or to use to decorate the Christmas table. Obviously you can also eat them, because they are all edible. You can use your pastry recipe otherwise I leave you this recipe I used for the preparation of pastry:
- 400 gr flour 00
- 200 gr butter
- 180 grams granulated sugar
- 1 egg
- Vanilla extract
- Grated lemon rind
If you want to prepare chocolate shortbread 50gr of flour for chocolate 50g!
PREPARATION OF THE FRULLUSS: Prepare the hand-picked or planetary pastry working the flour with cold butter until the mixture begins. Add the sugar and then the egg and vanilla. Form a dough, wrap in film and rest in the fridge for at least 2 hours.
To decorate:
- Royal grass prepared powder (Madame Loulou)
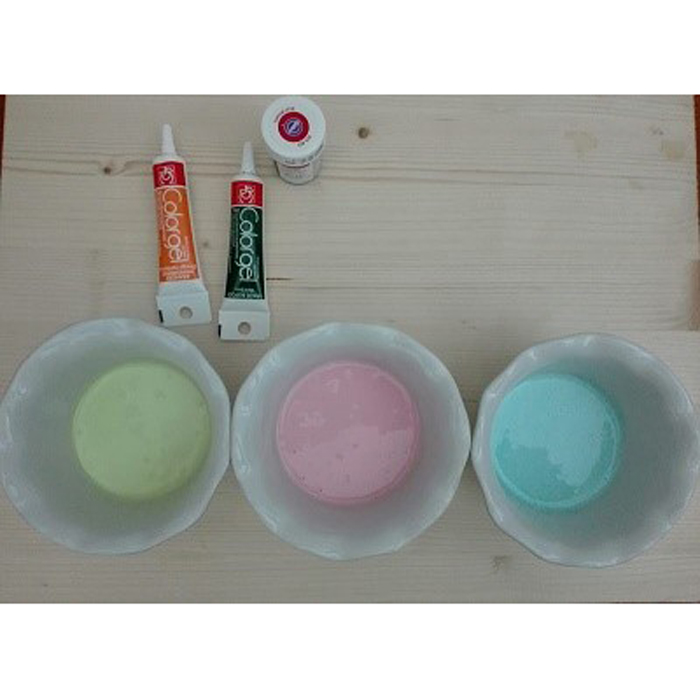
- Food dye
- Colorful smarties, configietines, beads and various decorations
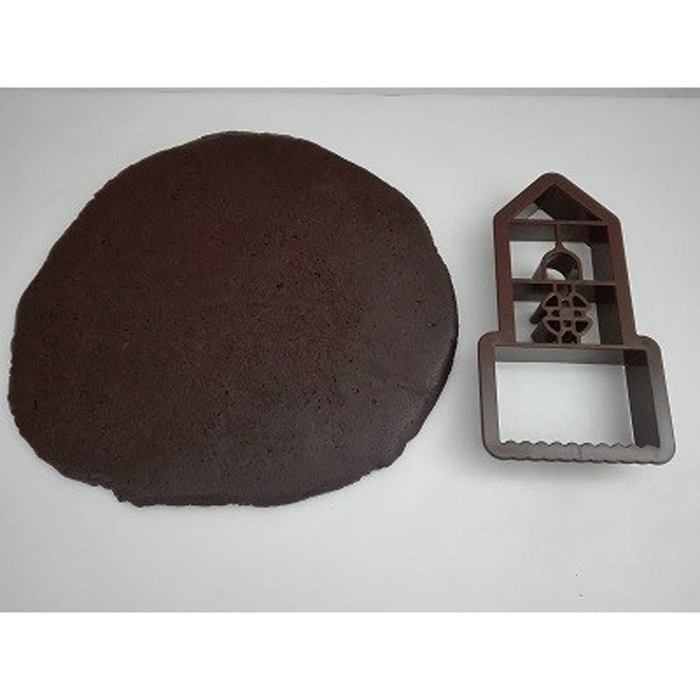
1
After rest, spread the shortbread of about 3 mm and cropped the silhouettes of the house with the decoration 3d stencil.
2
Leave 10 min cookies in the freezer before baking.
3
Bake at 150 ° C / 160 ° C for about 15 minutes, at half height. The cookies will have to be just golden. They baked and let cool well.
4
Prepare the actual frozen (Madame Loulou) following the instructions indicated on the package.
5
Divide the ice ready in various bowls depending on the colors to use and add a few drops of water to get a more fluid consistency. Leave a side-abounded part of white soda frost. To color the icy use the food colors in gel.
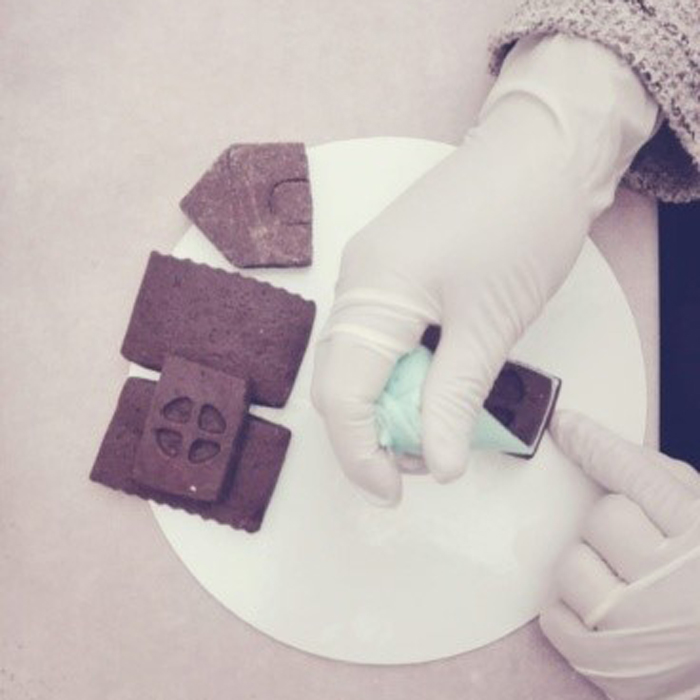
6
Transfer the compounds in the sac àimhe and insert them with the closets Pachi. To decorate the cookies you can use the spouts for SAC à a few, for the edges n.2 and to fill n.3 or alternatively you can work even without spouts, as I did.
7
Outline the edges of the cookies with thin glacier lines.
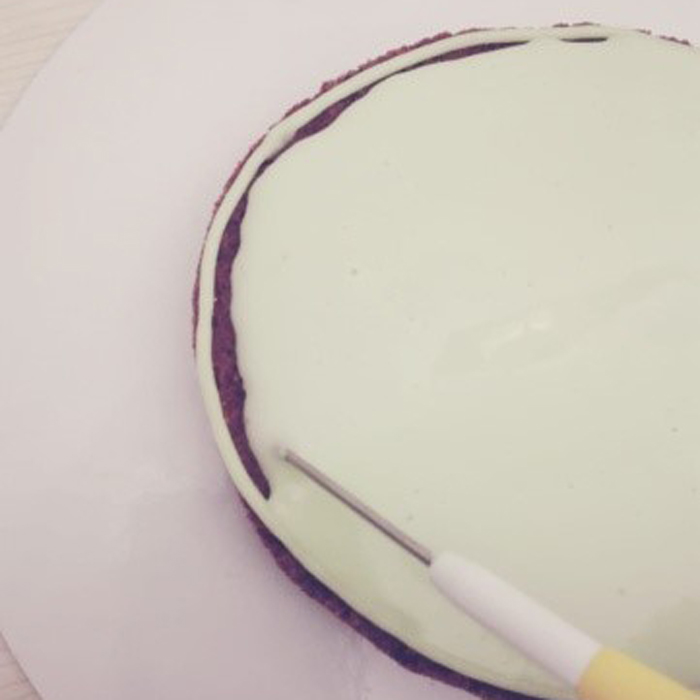
8
Fill the interior of cookies with more fluid glac. To extend the ice you can help you with a toothpick.

9
Let it dry for 3 hours at room temperature otherwise 6 min in the oven at 50 ° C.
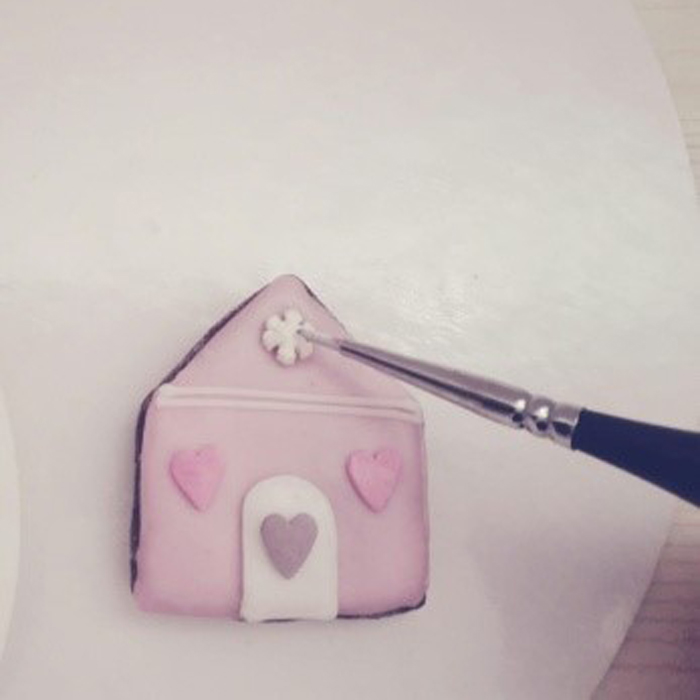
10
Start decorating the different parts of the cottage as the imagination suggested.
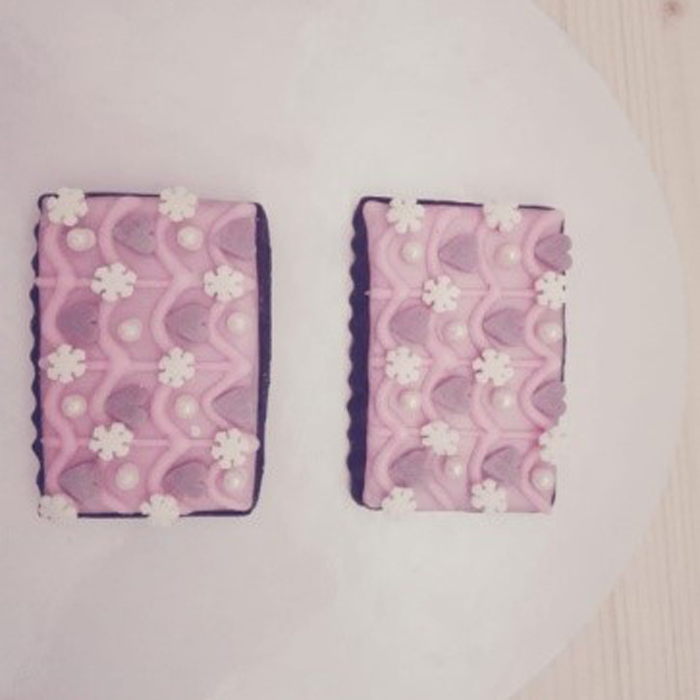
11
You can decorate each part at will.
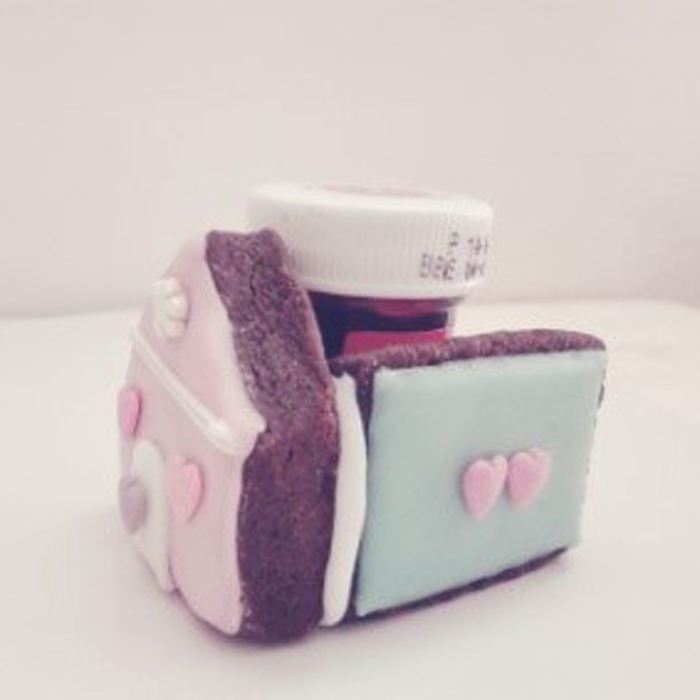
12
Take the parts of the house and attach them to them using the real frozen free glacier) as a glue.
13
Popping and glued with gossip all the perimeter of the house on another previously decorated cookie.
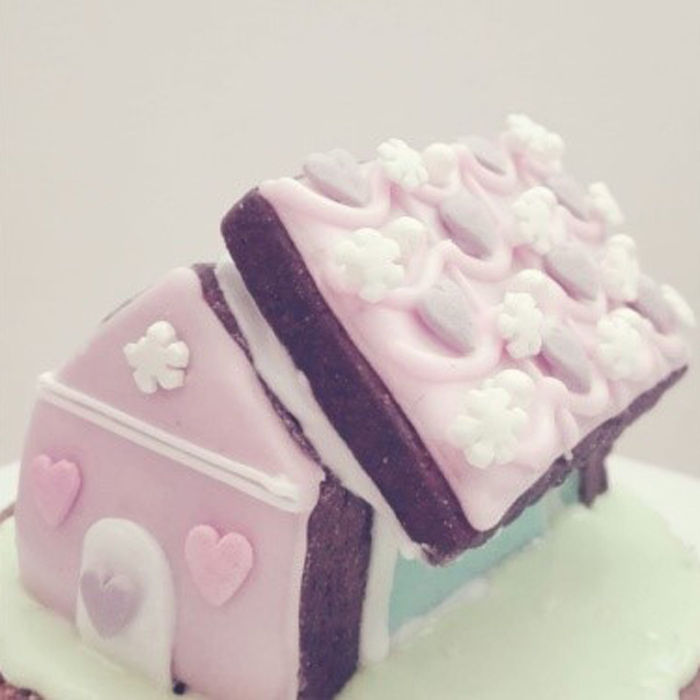
Put abundant frozen along all the upper edges of the house and rest the two pieces that form the roof and seal the 2 parts of the roof with the ice. Let it dry.
14
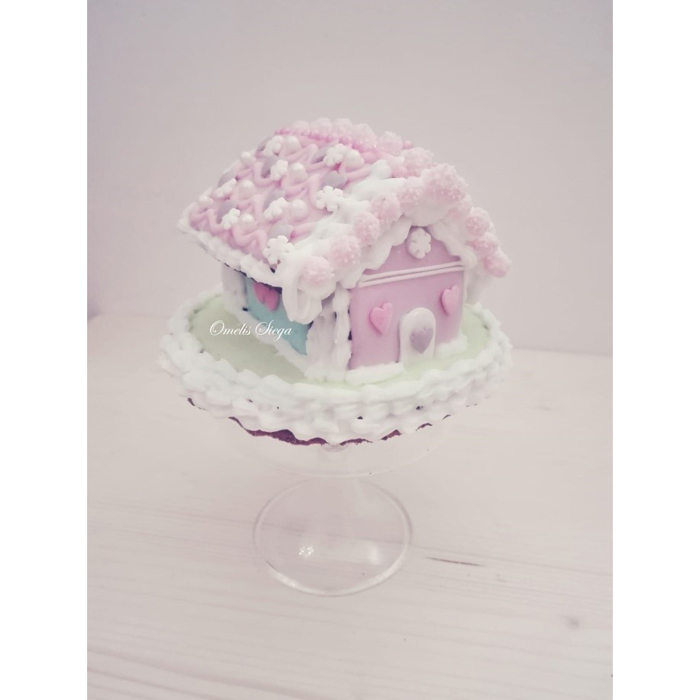
Decorate the edges of the roof and the walls of the house with plenty of real frozen. Allow to dry for 2 hours and here is the ready Christmas 3D cottage.

I thank Omelis for sharing this practical tutorial with us to create the 3D Christmas house Decora. Visit thefacebook page to see the beautiful homilis work